You may have found your perfect shed, but what do you do next? Before a shed can be installed, you must do a few things to prep your yard. All sheds from Heartland Sheds come with professional installation, typically scheduled within 4-6 weeks of your purchase, so you don’t have to do the hardest work yourself. But, you can take some steps to make the whole process easier.
Select the Right Shed
Maybe you’ve already chosen your shed, and you can skip over this step. But, if you haven’t, consider the size of your property and any local regulations that may restrict your ability to install a new shed. For example, you may not need to get a building permit if you are building a small garden shed, but an extra-large two-story shed could be another matter entirely, especially if you belong to an HOA. You may not be able to place a shed close to property lines, depending on local ordinances. Before you make your final purchase, make sure you have any necessary permits in order and the shed will fit appropriately in your yard. Need help finding the right shed for your needs? Check out our buyers guide.
Choose Your Installation Site
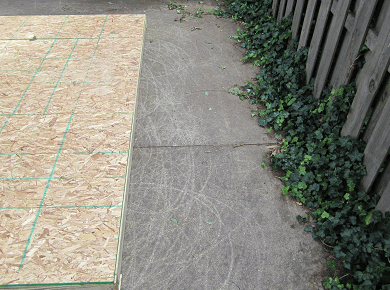
A good shed site has several feet of clearance around and above the shed’s dimensions: 3 feet is sufficient for most sheds, but if your shed is larger than 160 square feet, you’ll need 4 feet of clearance on each side.
An ideal site is also dry. If you know there is a low-lying area in your yard that retains water at certain times of the year, then you should not plan to build your shed there. This will increase the chance of damage to your shed floor, rot, mold, and possibly insects.
Prep Ground for Shed
Since Heartland Sheds sends a professional installer to build your storage shed, you do not need to worry about laying down gravel or a concrete pad as the foundation of your new structure. Our sheds are built on 4×4 pressure-treated runners with treated leveling materials and shingle shims. However, we do recommend installing your shed on a concrete slab or using solid cement blocks to improve the longevity of your shed’s foundations.
Heartland Sheds does not provide shed removal services. If you have an old shed in the same place where you would like your new shed, you will need to take care of the removal before installation begins. If you already have a concrete slab on your property from a past shed, we may still be able to install it so long as the slab is level within ½ inch and appropriately sized. Please contact us to determine with certainty whether or not we can install on your existing concrete slab. Installation with an existing concrete slab does not involve any reduction in price, due to the additional installation labor and materials.
The site should be close to level, within 6 inches or less. If there are no sufficiently level areas in your yard, you will need to level the site, either with leveling blocks or additional site preparation. You will also need access to electricity within 150 feet of the unit for proper installation.
Finally, at the intended location of the shed, place stakes in the ground to indicate the intended location of the shed, as well as a fifth stake where you would like to position the center of the door. Once you have this done, our professional installers will take care of the rest! For more information, check out our blog post about how to prep a shed foundation for installers.

Common Types of Shed Foundations
While Heartland Sheds can install sheds without a pre-laid foundation, the following options, like concrete slabs, increase the longevity of your shed, especially in rainy or snowy climates. Of course, there are other options for shed foundations besides the ones listed below, but these are some of the most common and effective.
Concrete Slab
A concrete slab is a solid, permanent foundation and is broadly considered one of the best options for the base of your shed. Although it is not the easiest DIY installation process of the options listed here, it will likely last for more than the lifetime of your shed and lies close to the ground for easy shed access. Keep in mind that the concrete needs to be poured in above freezing temperatures, and must be installed on a level surface.
Concrete slabs are a more expensive shed foundation option, ranging from around $2500 to $4000, depending on the desired size of the slab. Again, because of the longevity and protection provided by this particular type of foundation, the cost may pay for itself over time. Heartland Sheds recommends using a concrete slab as the foundation for your shed.

Concrete Pavers
For a small shed, consider concrete pavers. While they won’t hold heavy loads and may shift unevenly over time, concrete pavers are easy to install and are less of a permanent solution than a concrete slab. You can also personalize the look and size of them: the larger the concrete paver, the fewer you need to build the foundation.
Pavers range in cost, but a foundation like this will generally cost you between $100 and $200. If you invest in higher quality pavers, they will be more expensive. For example, some pavers include a steel mesh inside to increase longevity and stability.

Solid Concrete Blocks
Solid concrete blocks are another less permanent option for your shed foundation. These are a low-cost method of providing a foundation for your shed and allow you to level small slopes, so long as you can get your blocks level with each other. However, concrete blocks do not support the shed’s base as consistently as other foundation options, since the distance between the blocks has no support.
Your cost will be impacted by the number of blocks you need and the size of your shed, but this foundation option will likely not cost you more than $100.

Gravel Pad
Gravel pads, in conjunction with a frame made out of 4”x4” or other appropriately sized wood runners, can function well as DIY shed foundations. They are relatively easy to install, so long as the ground underneath is level and works especially well for small sheds. The downside: they may cause more ground contact than the other listed shed foundation options, which can cause rot or mold.
This option depends on the price of the gravel and the wood at the time of purchase, as well as the size of your shed. It could range between $200 and $400 to install a gravel pad with a frame.

Shed Installation Process
Our professional shed installers take care of most of the work involved in installing your new wood shed. After you purchase your shed, you will receive a call within three days to schedule your installation, usually within 4-6 weeks of purchase, although this may be extended up to 8-12 weeks, depending on location and time of year. During this time, prep your yard and make sure you are ready for your shed delivery.
Most sheds only take one day to install, but some larger sheds can take 2-3 days. This may include anything in our large or extra-large shed size categories, from 12×12 sheds up to 16×24 sheds. You do not need to be present for the whole installation, but you will need to be there at the beginning to show the installers where to put the shed, as well as at the end of the installation to walk through the installation.
If you still have questions about installation, please visit our installation process guide here. Your new shed will be installed and ready to make your own in no time.